Before you start
You need administrator rights in Microsoft Entra ID (formerly Azure AD). You will need a Redirect URI.
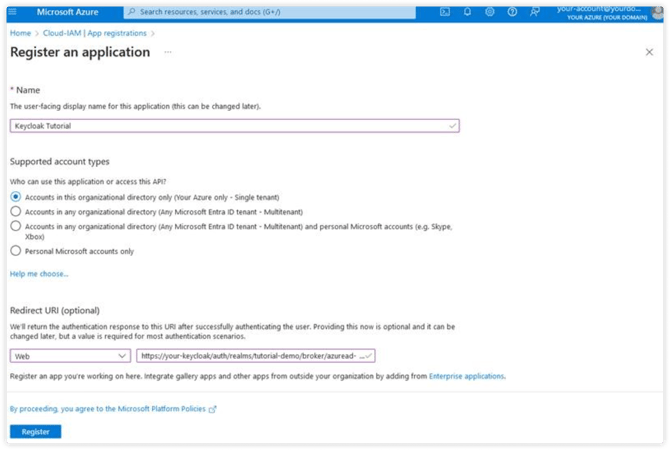
Step 1. Create an app registration in Azure
- Sign in to the Azure Portal.
- Open Microsoft Entra ID.
- In the sidebar, click App registrations under Manage.

- Limit users to Accounts in this organizational directory only
- Choose Web as the platform
- For Redirect URI, use the URI we supplied
Create a new registration for KYP SSO:
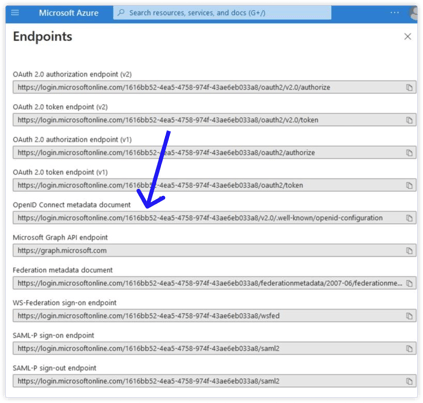
Step 2. Copy the Metadata Document Endpoint
- After registering, open Endpoints.
- Copy the OpenID Connect Metadata Document and save it.
- Close the Endpoints overview.
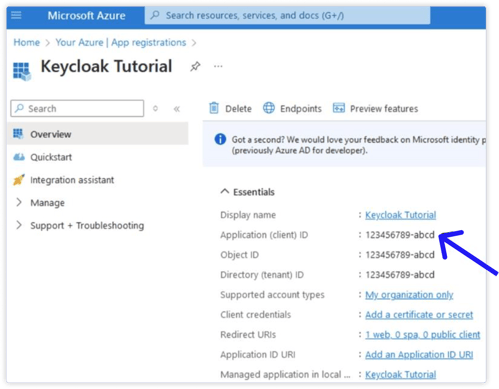
Step 3. Copy the Application (Client) ID
Copy the Application (client) ID from the registration and save it.
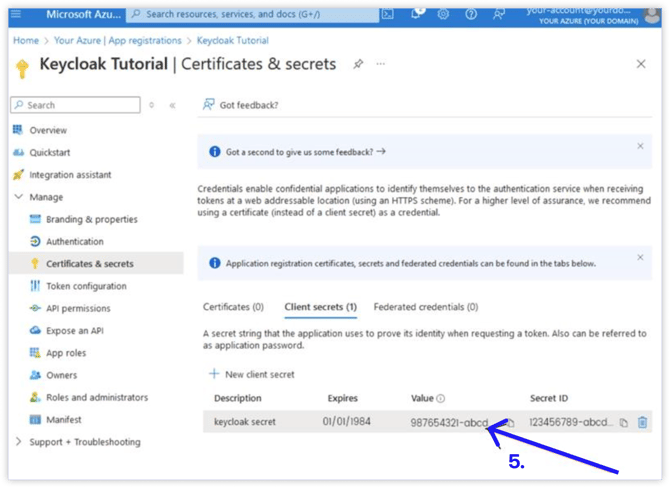
Step 4. Create a Client Secret
- In the app registration, go to Manage → Certificates & secrets.
- Select New client secret.
- Set a clear description and choose the recommended expiration.
- Click Add and copy the resulting secret value.
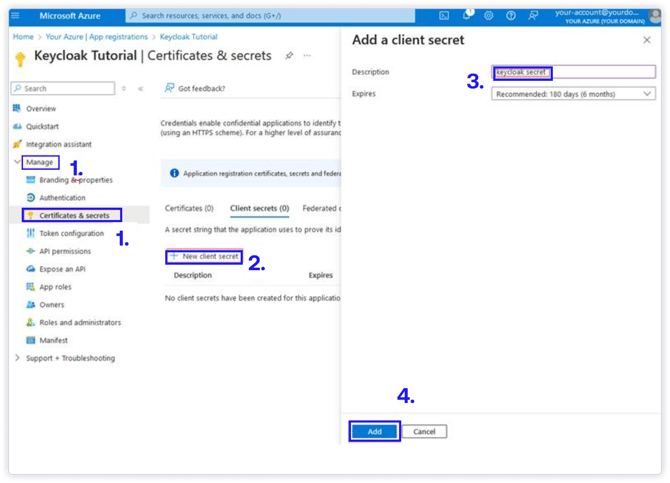
- Save the secret value.
Step 5. Configure API permissions
- Go to Manage → API permissions.
- Click Add a permission → Microsoft Graph → Delegated permissions.
- Add the following permissions:
openid,profile,email,offline_access, andGroupMember.Read.All. All of these are required for group syncing. - Click Add permissions.
- Then click Grant admin consent for the
User.Readpermission, so the application is authorized to call APIs related to "sign-in and read user profile".
Step 6. Configure the token
- Within the registered application, go to Manage → Token configuration.
- Click Add groups claim.
- Select Security groups in the Select group types to include in Access, ID, and SAML tokens menu.
- Under Customize token properties by type, only select Group ID for ID/Access/SAML.
- Do not tick Emit groups as role claims.
Step 7. Share the information securely with KYP
- Go to OneTimeSecret to share this information securely with us: https://eu.onetimesecret.com
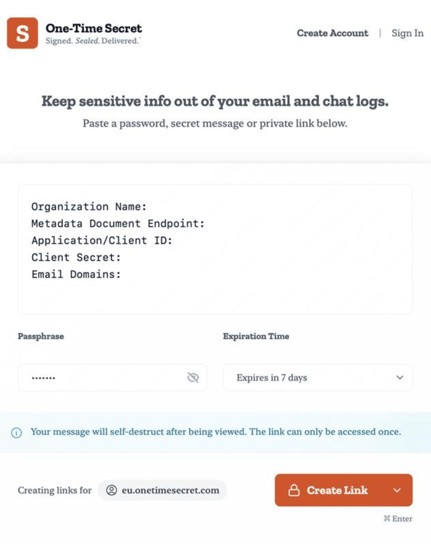
- Label and share the information from the previous steps. Set the expiration to 7 days. If you set a passphrase, share it with us as well.
- Include any additional information that may be useful for us, such as the email domains that should be routed to this identity provider and your organization's name.
- Click Create Link and send this link to us by email. Once the link is opened, the information will become inaccessible. This way we can guarantee that no third party has viewed it.